Ingredients
For the Cake Batter:
- 2 ½ cups all-purpose flour
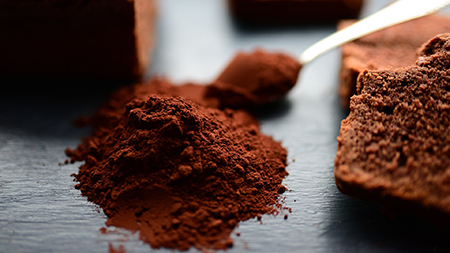
- 2 tablespoons unsweetened cocoa powder
- 1 ½ teaspoons baking soda
- 1 teaspoon salt
- 1 ½ cups granulated sugar
- 1 cup unsalted butter, softened
- 2 large eggs
- 1 teaspoon vanilla extract
- 1 cup buttermilk
- 1 tablespoon red food coloring
- 1 teaspoon white vinegar
For the Cream Cheese Frosting:
- 16 ounces cream cheese, softened
- 1 cup unsalted butter, softened
- 4 cups powdered sugar
- 1 teaspoon vanilla extract
Additional Decoration::
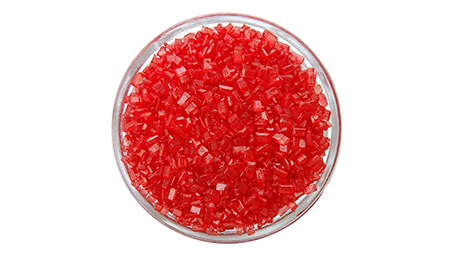
- Red Sugar Crystals
Instructions
- Preheat your oven to 350°F (175°C). Grease and flour two 9-inch round cake pans or line them with parchment paper.
- In a medium bowl, whisk together the flour, cocoa powder, baking soda, and salt. Set aside.
- In a large mixing bowl, cream together the granulated sugar and softened butter until light and fluffy.
- Add the eggs, one at a time, beating well after each addition. Stir in the vanilla extract.
- Gradually add the flour mixture to the butter mixture, alternating with buttermilk. Begin and end with the flour mixture. Mix until just combined.
- In a small bowl, mix the red food coloring and vinegar together. Add this mixture to the cake batter and stir until evenly distributed and the batter turns a vibrant red color.
- Divide the batter equally between the prepared cake pans. Smooth the tops with a spatula.
- Bake in the preheated oven for 25-30 minutes or until a toothpick inserted into the center of the cakes comes out clean.
- Remove the cakes from the oven and let them cool in the pans for about 10 minutes. Then transfer them to a wire rack to cool completely.
- While the cakes are cooling, prepare the cream cheese frosting. In a large mixing bowl, beat the softened cream cheese and butter together until smooth and creamy.
- Gradually add the powdered sugar, one cup at a time, and continue beating until well incorporated. Stir in the vanilla extract and mix until the frosting is light and fluffy.
- Once the cakes are completely cooled, place one cake layer on a serving plate. Spread a generous amount of cream cheese frosting on top. Place the second cake layer on top and frost the entire cake with the remaining cream cheese frosting.
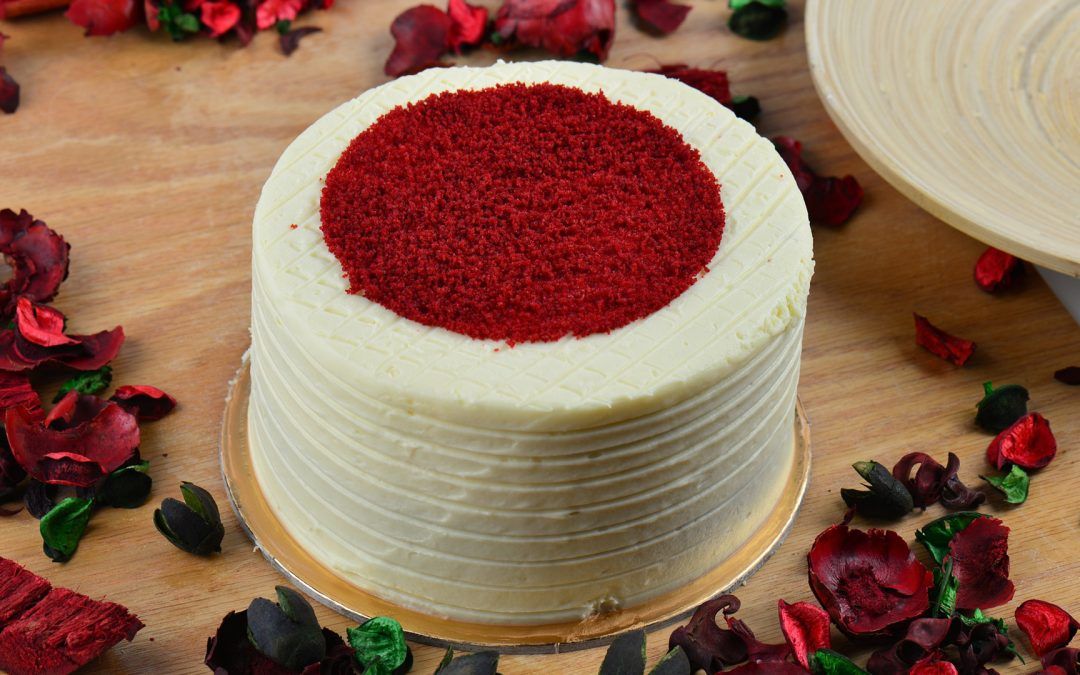
- Decorate the top of the cake with red sprinkles.
- Slice and serve the delicious Red Velvet Cake to enjoy!
Note: Remember to store the cake in the refrigerator if not serving immediately. Enjoy your mildly sweet Red Velvet Cake with cream cheese frosting and festive red sprinkles!
Optional Ingredients
Here are a few additional ingredients that would work well with the red velvet cake recipe:
- Buttermilk: You already have buttermilk in the recipe, but you can further enhance the tangy flavor and moistness of the cake by adding a tablespoon of lemon juice or vinegar to regular milk as a substitute for buttermilk.
- Sour cream: Adding 1/2 cup of sour cream to the cake batter can provide extra moisture and richness to the texture.
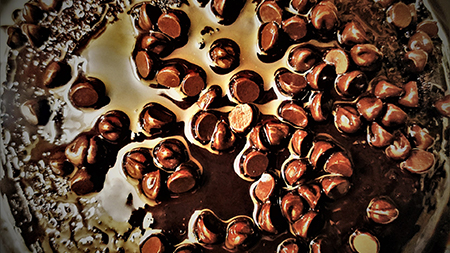
- Chocolate chips: Fold in 1/2 to 1 cup of semi-sweet or dark chocolate chips into the batter for bursts of chocolate throughout the cake.
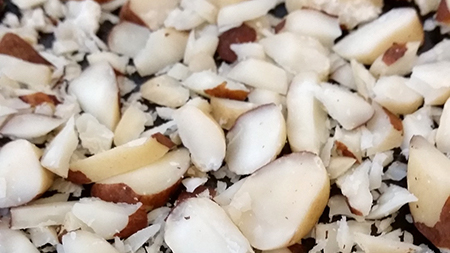
- Chopped nuts: Consider adding a 1/2 cup of finely chopped pecans or walnuts for a pleasant crunch and nutty flavor.
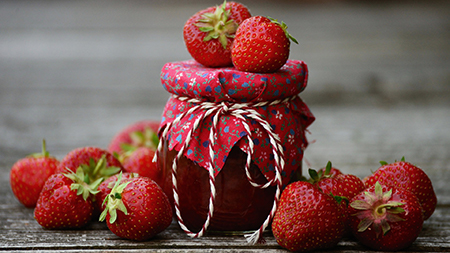
- Raspberry or strawberry filling: If you’d like to add a fruity twist to the cake, consider spreading a layer of raspberry or strawberry jam or preserves between the cake layers before frosting.
- Espresso powder: For those who enjoy a hint of coffee flavor, you can add 1-2 teaspoons of espresso powder to the dry ingredients to deepen the richness of the chocolate.
- Red Sugar Crystals: Sparkly, chunky, sugar crystals for sprinkling on cakes an cupcakes.
Remember to adjust the quantities of the additional ingredients to maintain the desired texture and balance in the cake. These additions can add extra layers of flavor and texture, making your Red Velvet Cake even more delightful!
Plating Recommendations
Here are a few plating recommendations to enhance the presentation of your finished red velvet cake:
- Cake Stand: Place the frosted Red Velvet Cake on a beautiful cake stand to give it a prominent position and elevate its presence on the table. Opt for a stand that complements the colors of the cake, such as a classic white or a stand with a touch of red to match the theme.
- Smooth Frosting: Use an offset spatula or a cake scraper to create a smooth and even layer of cream cheese frosting on the cake. Pay attention to the sides and ensure they are uniformly covered.
- Crumb Coat: Before applying the final layer of frosting, consider applying a thin layer of frosting all over the cake to seal in any loose crumbs. This is known as a crumb coat and helps achieve a cleaner presentation.
- Piping Designs: If you’re comfortable with piping, you can use a piping bag fitted with a star tip or a round tip to create decorative designs on the top and sides of the cake. Common options include a border around the bottom and top edges, rosettes, or swirls.
- Garnish with Red Sprinkles: Sprinkle red sprinkles or edible glitter over the top of the cake to enhance its visual appeal and reinforce the red velvet theme. You can scatter them lightly or create a pattern, depending on your preference.
- Fresh Berries: Consider adding a few fresh berries, such as raspberries or strawberries, around the base of the cake or as a garnish on individual slices. They add a pop of color and a touch of freshness.
- Dusting of Cocoa Powder: If desired, lightly dust the top of the cake with a dusting of cocoa powder. This adds a touch of elegance and highlights the chocolate flavor.
Remember to let your creativity shine through and adapt the plating recommendations to your personal style and occasion. The presentation of the cake plays an important role in enhancing the overall dining experience and making it visually enticing. Enjoy showcasing your beautifully plated Red Velvet Cake!
Be sensitive to what food allergies or dietary restrictions your guests might have.
Dairy Free Red Velvet Cake Recipe
Here’s a modified version of the original red velvet cake recipe to make it dairy-free:
Ingredients for the Cake Batter:
- 2 ½ cups all-purpose flour
- 2 tablespoons unsweetened cocoa powder
- 1 ½ teaspoons baking soda
- 1 teaspoon salt
- 1 ½ cups granulated sugar
- 1 cup dairy-free butter or margarine, softened
- 2 large eggs
- 1 teaspoon vanilla extract
- 1 cup dairy-free buttermilk (1 cup of unsweetened non-dairy milk + 1 tablespoon lemon juice or vinegar, let sit for 5 minutes)
- 1 tablespoon red food coloring
- 1 teaspoon white vinegar
Ingredients for the Cream Cheese Frosting (Dairy-Free):
- 16 ounces dairy-free cream cheese substitute (such as vegan cream cheese), softened
- 1 cup dairy-free butter substitute (such as vegan butter), softened
- 4 cups powdered sugar
- 1 teaspoon vanilla extract
Instructions for Baking a Dairy-Free Red Velvet Cake:
- Preheat your oven to 350°F (175°C). Grease and flour two 9-inch round cake pans or line them with parchment paper.
- In a medium bowl, whisk together the flour, cocoa powder, baking soda, and salt. Set aside.
- In a large mixing bowl, cream together the granulated sugar and softened dairy-free butter or margarine until light and fluffy.
- Add the eggs, one at a time, beating well after each addition. Stir in the vanilla extract.
- Gradually add the flour mixture to the butter mixture, alternating with the dairy-free buttermilk. Begin and end with the flour mixture. Mix until just combined.
- In a small bowl, mix the red food coloring and vinegar together. Add this mixture to the cake batter and stir until evenly distributed and the batter turns a vibrant red color.
- Divide the batter equally between the prepared cake pans. Smooth the tops with a spatula.
- Bake in the preheated oven for 25-30 minutes or until a toothpick inserted into the center of the cakes comes out clean.
- Remove the cakes from the oven and let them cool in the pans for about 10 minutes. Then transfer them to a wire rack to cool completely.
- While the cakes are cooling, prepare the dairy-free cream cheese frosting. In a large mixing bowl, beat the softened dairy-free cream cheese and dairy-free butter substitute until smooth and creamy.
- Gradually add the powdered sugar, one cup at a time, and continue beating until well incorporated. Stir in the vanilla extract and mix until the frosting is light and fluffy.
- Once the cakes are completely cooled, place one cake layer on a serving plate. Spread a generous amount of dairy-free cream cheese frosting on top. Place the second cake layer on top and frost the entire cake with the remaining dairy-free cream cheese frosting.
- Slice and serve the delicious Dairy-Free Red Velvet Cake!
Please note that the taste and texture of the cake and frosting may differ slightly from the original recipe due to the substitutions. Ensure you choose suitable dairy-free alternatives based on your dietary needs and preferences. Enjoy your dairy-free Red Velvet Cake!
Gluten Free Red Velvet Cake Recipe
Here’s a modified version of the original red velvet cake recipe to make it gluten-free:
Ingredients for the Cake Batter:
- 2 ½ cups gluten-free all-purpose flour blend
- 2 tablespoons unsweetened cocoa powder (ensure it’s gluten-free)
- 1 ½ teaspoons baking soda
- 1 teaspoon xanthan gum (if your flour blend doesn’t already contain it)
- 1 teaspoon salt
- 1 ½ cups granulated sugar
- 1 cup unsalted butter, softened
- 2 large eggs
- 1 teaspoon vanilla extract
- 1 cup buttermilk (or dairy-free alternative)
- 1 tablespoon red food coloring
- 1 teaspoon white vinegar
Ingredients for the Cream Cheese Frosting (Gluten-Free):
- 16 ounces cream cheese, softened
- 1 cup unsalted butter, softened
- 4 cups powdered sugar
- 1 teaspoon vanilla extract
Instructions for Baking a Gluten-Free Red Velvet Cake:
- Preheat your oven to 350°F (175°C). Grease and flour two 9-inch round cake pans or line them with parchment paper.
- In a medium bowl, whisk together the gluten-free all-purpose flour blend, cocoa powder, baking soda, xanthan gum (if needed), and salt. Set aside.
- In a large mixing bowl, cream together the granulated sugar and softened butter until light and fluffy.
- Add the eggs, one at a time, beating well after each addition. Stir in the vanilla extract.
- Gradually add the flour mixture to the butter mixture, alternating with the buttermilk. Begin and end with the flour mixture. Mix until just combined.
- In a small bowl, mix the red food coloring and vinegar together. Add this mixture to the cake batter and stir until evenly distributed and the batter turns a vibrant red color.
- Divide the batter equally between the prepared cake pans. Smooth the tops with a spatula.
- Bake in the preheated oven for 25-30 minutes or until a toothpick inserted into the center of the cakes comes out clean.
- Remove the cakes from the oven and let them cool in the pans for about 10 minutes. Then transfer them to a wire rack to cool completely.
- While the cakes are cooling, prepare the cream cheese frosting. In a large mixing bowl, beat the softened cream cheese and butter until smooth and creamy.
- Gradually add the powdered sugar, one cup at a time, and continue beating until well incorporated. Stir in the vanilla extract and mix until the frosting is light and fluffy.
- Once the cakes are completely cooled, place one cake layer on a serving plate. Spread a generous amount of cream cheese frosting on top. Place the second cake layer on top and frost the entire cake with the remaining cream cheese frosting.
- Slice and serve the delicious Gluten-Free Red Velvet Cake!
Remember to use gluten-free ingredients and check that they are labeled as gluten-free to avoid cross-contamination. Enjoy your gluten-free Red Velvet Cake!
Sugar Free Red Velvet Cake Recipe
Here’s a modified version of the original red velvet cake recipe to make it sugar-free:
Ingredients for the Cake Batter:
- 2 cups all-purpose flour
- 1 1/2 cups sugar substitute (such as stevia, erythritol, or monk fruit sweetener)
- 3/4 cup unsweetened cocoa powder
- 1 1/2 teaspoons baking powder
- 1 1/2 teaspoons baking soda
- 1 teaspoon salt
- 2 large eggs
- 1 cup unsweetened applesauce
- 1/2 cup vegetable oil
- 2 teaspoons pure vanilla extract
- 1 cup boiling water
- 4 ounces unsweetened dark chocolate, melted and cooled
Ingredients for the Cream Cheese Frosting (Sugar-Free):
- 16 ounces cream cheese, softened
- 1 cup unsalted butter, softened
- 4 cups powdered sugar substitute (such as powdered erythritol or powdered stevia)
- 1 teaspoon vanilla extract
Instructions for Baking a Sugar-Free Red Velvet Cake:
- Preheat your oven to 350°F (175°C). Grease and flour two 9-inch round cake pans or line them with parchment paper.
- In a medium bowl, whisk together the flour, cocoa powder, baking soda, and salt. Set aside.
- In a large mixing bowl, cream together the granulated sugar substitute and softened butter until light and fluffy.
- Add the eggs, one at a time, beating well after each addition. Stir in the vanilla extract.
- Gradually add the flour mixture to the butter mixture, alternating with the buttermilk. Begin and end with the flour mixture. Mix until just combined.
- In a small bowl, mix the red food coloring and vinegar together. Add this mixture to the cake batter and stir until evenly distributed and the batter turns a vibrant red color.
- Divide the batter equally between the prepared cake pans. Smooth the tops with a spatula.
- Bake in the preheated oven for 25-30 minutes or until a toothpick inserted into the center of the cakes comes out clean.
- Remove the cakes from the oven and let them cool in the pans for about 10 minutes. Then transfer them to a wire rack to cool completely.
- While the cakes are cooling, prepare the cream cheese frosting. In a large mixing bowl, beat the softened cream cheese and butter until smooth and creamy.
- Gradually add the powdered sugar substitute, one cup at a time, and continue beating until well incorporated. Stir in the vanilla extract and mix until the frosting is light and fluffy.
- Once the cakes are completely cooled, place one cake layer on a serving plate. Spread a generous amount of cream cheese frosting on top. Place the second cake layer on top and frost the entire cake with the remaining cream cheese frosting.
- Slice and serve the delicious Sugar-Free Red Velvet Cake!
Remember to use a sugar substitute that is suitable for baking and follow the manufacturer’s instructions for equivalent measurements. Enjoy your sugar-free Red Velvet Cake!
Low-Carb Red Velvet Cake Recipe
Here’s a modified version of the original red velvet cake recipe to make it low-carb:
Ingredients for the Cake Batter:
- 2 ½ cups almond flour
- 2 tablespoons unsweetened cocoa powder
- 1 ½ teaspoons baking soda
- 1 teaspoon salt
- 1 cup granulated sugar substitute (such as erythritol or stevia)
- 1 cup unsalted butter, softened
- 4 large eggs
- 1 teaspoon vanilla extract
- 1 cup buttermilk (or dairy-free alternative)
- 1 tablespoon red food coloring
- 1 teaspoon white vinegar
Ingredients for the Cream Cheese Frosting (Low-Carb):
- 16 ounces cream cheese, softened
- 1 cup unsalted butter, softened
- 1 cup powdered sugar substitute (such as powdered erythritol or powdered stevia)
- 1 teaspoon vanilla extract
Instructions for Baking a Low-Carb Red Velvet Cake:
- Preheat your oven to 350°F (175°C). Grease and flour two 9-inch round cake pans or line them with parchment paper.
- In a medium bowl, whisk together the almond flour, cocoa powder, baking soda, and salt. Set aside.
- In a large mixing bowl, cream together the granulated sugar substitute and softened butter until light and fluffy.
- Add the eggs, one at a time, beating well after each addition. Stir in the vanilla extract.
- Gradually add the flour mixture to the butter mixture, alternating with the buttermilk. Begin and end with the flour mixture. Mix until just combined.
- In a small bowl, mix the red food coloring and vinegar together. Add this mixture to the cake batter and stir until evenly distributed and the batter turns a vibrant red color.
- Divide the batter equally between the prepared cake pans. Smooth the tops with a spatula.
- Bake in the preheated oven for 25-30 minutes or until a toothpick inserted into the center of the cakes comes out clean.
- Remove the cakes from the oven and let them cool in the pans for about 10 minutes. Then transfer them to a wire rack to cool completely.
- While the cakes are cooling, prepare the cream cheese frosting. In a large mixing bowl, beat the softened cream cheese and butter until smooth and creamy.
- Gradually add the powdered sugar substitute, one cup at a time, and continue beating until well incorporated. Stir in the vanilla extract and mix until the frosting is light and fluffy.
- Once the cakes are completely cooled, place one cake layer on a serving plate. Spread a generous amount of cream cheese frosting on top. Place the second cake layer on top and frost the entire cake with the remaining cream cheese frosting.
- Slice and serve the delicious Low-Carb Red Velvet Cake!
Remember to use a sugar substitute that is suitable for low-carb diets and follow the manufacturer’s instructions for equivalent measurements. Enjoy your low-carb Red Velvet Cake!
Vegan Red Velvet Cake Recipe
Here’s a modified version of the original red velvet cake recipe to make it vegan:
Ingredients for the Cake Batter:
- 2 ½ cups all-purpose flour
- 2 tablespoons unsweetened cocoa powder
- 1 ½ teaspoons baking soda
- 1 teaspoon salt
- 1 ½ cups granulated sugar
- 1 cup unsweetened applesauce
- ¾ cup vegetable oil
- 1 ½ cups plant-based milk (such as almond milk or soy milk)
- 1 tablespoon apple cider vinegar
- 1 teaspoon vanilla extract
- 1 tablespoon red food coloring
Ingredients for Vegan Cream Cheese Frosting:
- 16 ounces vegan cream cheese
- ½ cup vegan butter, softened
- 4 cups powdered sugar
- 1 teaspoon vanilla extract
Instructions for Baking a Vegan Red Velvet Cake:
- Preheat your oven to 350°F (175°C). Grease and flour two 9-inch round cake pans or line them with parchment paper.
- In a medium bowl, whisk together the flour, cocoa powder, baking soda, and salt. Set aside.
- In a large mixing bowl, whisk together the granulated sugar, applesauce, vegetable oil, plant-based milk, apple cider vinegar, vanilla extract, and red food coloring until well combined.
- Gradually add the dry ingredients to the wet ingredients, mixing until just combined. Be careful not to overmix.
- Divide the batter equally between the prepared cake pans. Smooth the tops with a spatula.
- Bake in the preheated oven for 25-30 minutes or until a toothpick inserted into the center of the cakes comes out clean.
- Remove the cakes from the oven and let them cool in the pans for about 10 minutes. Then transfer them to a wire rack to cool completely.
- While the cakes are cooling, prepare the vegan cream cheese frosting. In a large mixing bowl, beat the vegan cream cheese and softened vegan butter until smooth and creamy.
- Gradually add the powdered sugar, one cup at a time, and continue beating until well incorporated. Stir in the vanilla extract and mix until the frosting is light and fluffy.
- Once the cakes are completely cooled, place one cake layer on a serving plate. Spread a generous amount of vegan cream cheese frosting on top.
Place the second cake layer on top and frost the entire cake with the remaining vegan cream cheese frosting. - Slice and serve the delicious Vegan Red Velvet Cake!
Keto Red Velvet Cake Recipe
Here’s a modified version of the original red velvet cake recipe to make it Keto:
Ingredients for the Cake Batter:
- 2 ½ cups almond flour
- 2 tablespoons unsweetened cocoa powder
- 1 ½ teaspoons baking soda
- 1 teaspoon salt
- 1 ½ cups granulated sugar substitute (such as erythritol or stevia)
- 1 cup unsalted butter, melted
- 4 large eggs
- 1 teaspoon vanilla extract
- 1 cup unsweetened almond milk (or any other unsweetened non-dairy milk)
- 1 tablespoon red food coloring
- 1 teaspoon white vinegar
Ingredients for Keto Cream Cheese Frosting:
- 16 ounces cream cheese, softened
- ½ cup unsalted butter, softened
- 1 cup powdered sugar substitute (such as powdered erythritol or powdered stevia)
- 1 teaspoon vanilla extract
Instructions for Baking a Keto Red Velvet Cake:
- Preheat your oven to 350°F (175°C). Grease and flour two 9-inch round cake pans or line them with parchment paper.
- In a medium bowl, whisk together the almond flour, cocoa powder, baking soda, and salt. Set aside.
- In a large mixing bowl, whisk together the granulated sugar substitute and melted butter until well combined.
- Add the eggs, one at a time, whisking well after each addition. Stir in the vanilla extract.
- Gradually add the flour mixture to the butter mixture, alternating with the almond milk. Begin and end with the flour mixture. Mix until just combined.
- In a small bowl, mix the red food coloring and vinegar together. Add this mixture to the cake batter and stir until evenly distributed and the batter turns a vibrant red color.
- Divide the batter equally between the prepared cake pans. Smooth the tops with a spatula.
- Bake in the preheated oven for 25-30 minutes or until a toothpick inserted into the center of the cakes comes out clean.
- Remove the cakes from the oven and let them cool in the pans for about 10 minutes. Then transfer them to a wire rack to cool completely.
- While the cakes are cooling, prepare the keto cream cheese frosting. In a large mixing bowl, beat the softened cream cheese and softened butter until smooth and creamy.
- Gradually add the powdered sugar substitute, one cup at a time, and continue beating until well incorporated. Stir in the vanilla extract and mix until the frosting is light and fluffy.
- Once the cakes are completely cooled, place one cake layer on a serving plate. Spread a generous amount of keto cream cheese frosting on top.
Place the second cake layer on top and frost the entire cake with the remaining keto cream cheese frosting. - Slice and enjoy your delicious Keto Red Velvet Cake!
Remember to use a sugar substitute that is suitable for a keto diet and follow the manufacturer’s instructions for equivalent measurements. Enjoy your keto-friendly Red Velvet Cake!
Here is some general nutrition information for the original red velvet cake recipe up above:
Please note that these values are approximate and can vary based on specific ingredients used and any variations made to the recipe:
(per serving, based on 12 servings)
- Calories: Approximately 520-550 calories
- Total Fat: 30-32 grams
- Saturated Fat: 18-20 grams
- Cholesterol: 105-120 milligrams
- Sodium: 370-400 milligrams
- Carbohydrates: 57-60 grams
- Fiber: 1-2 grams
- Sugars: 41-44 grams
- Protein: 6-7 grams
(per serving, based on 16 servings)
- Calories: Approximately 390-410 calories
- Total Fat: 22-24 grams
- Saturated Fat: 13-15 grams
- Cholesterol: 80-90 milligrams
- Sodium: 280-300 milligrams
- Carbohydrates: 43-45 grams
- Fiber: 1 gram
- Sugars: 31-33 grams
- Protein: 5-6 grams
Please note that these values are estimates and can vary depending on the specific ingredients and measurements used. It’s always a good idea to calculate the nutrition information based on the specific brands and quantities of ingredients you use if you require precise dietary information.
- Mixing Bowls: Various sizes of mixing bowls are useful for combining ingredients. Opt for heatproof glass or stainless steel bowls.
- Measuring Cups and Spoons: A set of measuring cups (1 cup, 1/2 cup, 1/4 cup, and 1/3 cup) and measuring spoons (1 tablespoon, 1 teaspoon, 1/2 teaspoon, and 1/4 teaspoon) for accurate ingredient measurements.
- Electric Mixer: A stand mixer or handheld electric mixer can make mixing the cake batter and frosting easier and more efficient.
- Whisk: A whisk is handy for blending dry ingredients and ensuring they’re evenly distributed.
- Spatulas: Both rubber spatulas and offset spatulas are useful for scraping down the sides of bowls, folding in ingredients, and smoothing frosting.
- Cake Pans: Two 9-inch round cake pans for baking the cake layers. Opt for non-stick pans or line them with parchment paper for easy removal.
- Cooling Rack: A wire cooling rack allows air to circulate around the cakes, promoting even cooling.
- Piping Bag and Tips: If you want to pipe decorations or borders, a piping bag and assorted tips will come in handy.
- Cake Stand or Serving Plate: Present your cake on a cake stand or a decorative serving plate for an appealing presentation.
- Knife or Cake Leveler: To level the cake layers or trim the tops for an even surface, a serrated knife or a cake leveler is useful.
- Offset Spatula or Palette Knife: Use an offset spatula or a palette knife for applying frosting and achieving a smooth finish.
- Cake Server or Slicing Knife: For serving the cake, have a cake server or a long, serrated knife to cut neat slices.
Remember, this is a general list of equipment, and you may already have some of these items in your kitchen. Adapt the list based on your personal preferences and the tools you have available.
Q: Why is red food coloring used in Red Velvet Cake?
A: Red food coloring is used to achieve the signature vibrant red color of Red Velvet Cake. Originally, the cake’s color was a reaction between cocoa powder and acidic ingredients, like vinegar and buttermilk, but nowadays, red food coloring is commonly added for a more intense and consistent red hue.
Q: Can I substitute natural food coloring for red food coloring in Red Velvet Cake?
A: While natural food coloring options exist, they might not provide the same vibrant red color as artificial red food coloring. You can try using natural alternatives like beetroot powder or natural food dyes, but keep in mind that the color outcome may be more subtle and earthy.
Q: How do I prevent my Red Velvet Cake from drying out?
A: To prevent a dry cake, ensure you don’t overbake it. Red Velvet Cake should be moist and tender. Start checking for doneness a few minutes before the recommended baking time and remove it from the oven when a toothpick inserted into the center comes out with a few moist crumbs clinging to it. Additionally, properly storing the cake in an airtight container or wrapping it tightly with plastic wrap can help maintain its moisture.
Q: Can I make Red Velvet Cupcakes instead of a cake?
A: Absolutely! Red Velvet Cupcakes are a popular alternative to a full-sized cake. The batter can be portioned into cupcake liners and baked for a shorter time, usually around 15-20 minutes. Just remember to adjust the baking time and keep an eye on them for doneness.